


Views: 0 Author: Site Editor Publish Time: 2026-07-28 Origin: Site


Drivetrain stabilization dictates the lifespan and ride quality of modern vehicles. Chery’s turbocharged four-cylinder engines, specifically the 1.5T, 1.6T, and 2.0T variants, generate substantial torque that requires precise mounting systems to manage output and mitigate structural stress. When factory mounts degrade, the powertrain shifts out of alignment. This movement transfers harsh vibrations directly into the cabin and places severe mechanical strain on the entire chassis.
Sourcing sub-standard replacement mounts introduces immediate risks. Inferior rubber compounds fail to absorb Noise, Vibration, and Harshness (NVH), while poor dimensional accuracy causes drivetrain misalignment and accelerates wear on adjacent suspension components like CV joints and exhaust flex pipes. Selecting the correct Engine mount for Chery platforms demands strict evaluation of OEM fitment data, material composition, and adherence to factory multi-phase torque specifications.
Engine mounts isolate the cabin and chassis from the inherent vibrations of Chery's four-cylinder powertrains. The internal combustion process generates constant kinetic energy and secondary harmonic vibrations. Without proper isolation, these frequencies transfer directly through the subframe, creating a loud, resonant cabin environment. Mounts act as both acoustic barriers and physical dampeners, absorbing the shockwaves before they reach the driver.
The success criteria for a replacement mount focus entirely on restoring factory-level cabin acoustics and eliminating idle vibration. A high-quality mount absorbs low-frequency rumbles during deceleration and high-frequency buzzing at highway speeds. When installed correctly, you will notice an immediate reduction in steering wheel shake, dashboard rattle, and pedal vibration during cold starts and idle conditions.
| NVH Symptom | Probable Mount Failure Type | Impact on Chery Chassis |
|---|---|---|
| Steering wheel vibration at idle | Collapsed rubber bushing (Right side mount) | Direct transfer of engine harmonics to steering column. |
| Loud clunking during gear shifts | Torn lower torque strut mount | Excessive engine pitch, stressing transmission linkages. |
| High-frequency buzzing at 3000 RPM | Leaking hydraulic fluid (Active mount) | Loss of fluid dampening, metal-to-metal contact inside housing. |
Keeping the engine and transmission perfectly aligned with the CV axles is a strict mechanical requirement for front-wheel-drive and all-wheel-drive Chery models. The mounting system dictates the physical resting position of the powertrain within the engine bay. Proper alignment ensures that power transfers efficiently from the transaxle to the wheels without binding the constant velocity joints.
A failing mount alters this geometry significantly. When the engine sags or shifts off its axis, it pulls on connected systems. This misalignment leads to secondary failures in exhaust flex pipes, which tear under the unnatural stretching. It also alters the plunge depth of the CV axles, leading to premature joint wear and transmission seal leaks. Replacing a worn mount promptly protects these adjacent, highly expensive components from catastrophic failure.
The high-torque, rapid-spooling characteristics of Chery’s 1.5T and 1.6T Acteco engines place dynamic, non-linear stress on mounting brackets. Turbocharged engines produce sudden surges of power as boost builds. These torque spikes force the engine to twist violently against its mounts during rapid acceleration, placing immense shear force on the rubber isolators.
Standard, generic mounts fail prematurely under these sudden torque spikes. They lack the structural rigidity and specific durometer ratings required for modern turbocharged Chery powerplants. The rubber tears away from the metal casing, or the aluminum brackets fatigue and crack, leading to a complete loss of drivetrain stabilization. Choosing a mount engineered specifically for the thermal and kinetic loads of turbocharged applications is mandatory for long-term reliability.
The standard OEM material uses a vulcanized rubber-metal design for superior vibration absorption compared to stiffer aftermarket polyurethane options. Rubber flexes naturally in multiple directions, absorbing a wide range of frequencies generated by the engine. Polyurethane, while highly durable and resistant to chemical degradation, is extremely rigid. It transmits significantly more engine noise and vibration directly into the cabin, making it unsuitable for daily-driven Chery SUVs.
Durometer, or material hardness, dictates how well the mount performs its dual role. The rubber must be hard enough to support the static weight of the engine without sagging over time, yet soft enough to prevent harshness from reaching the subframe. Premium rubber-metal mounts strike this exact balance, utilizing specific rubber compounds that provide longevity without sacrificing the ride comfort expected in models like the Tiggo 8 Pro.
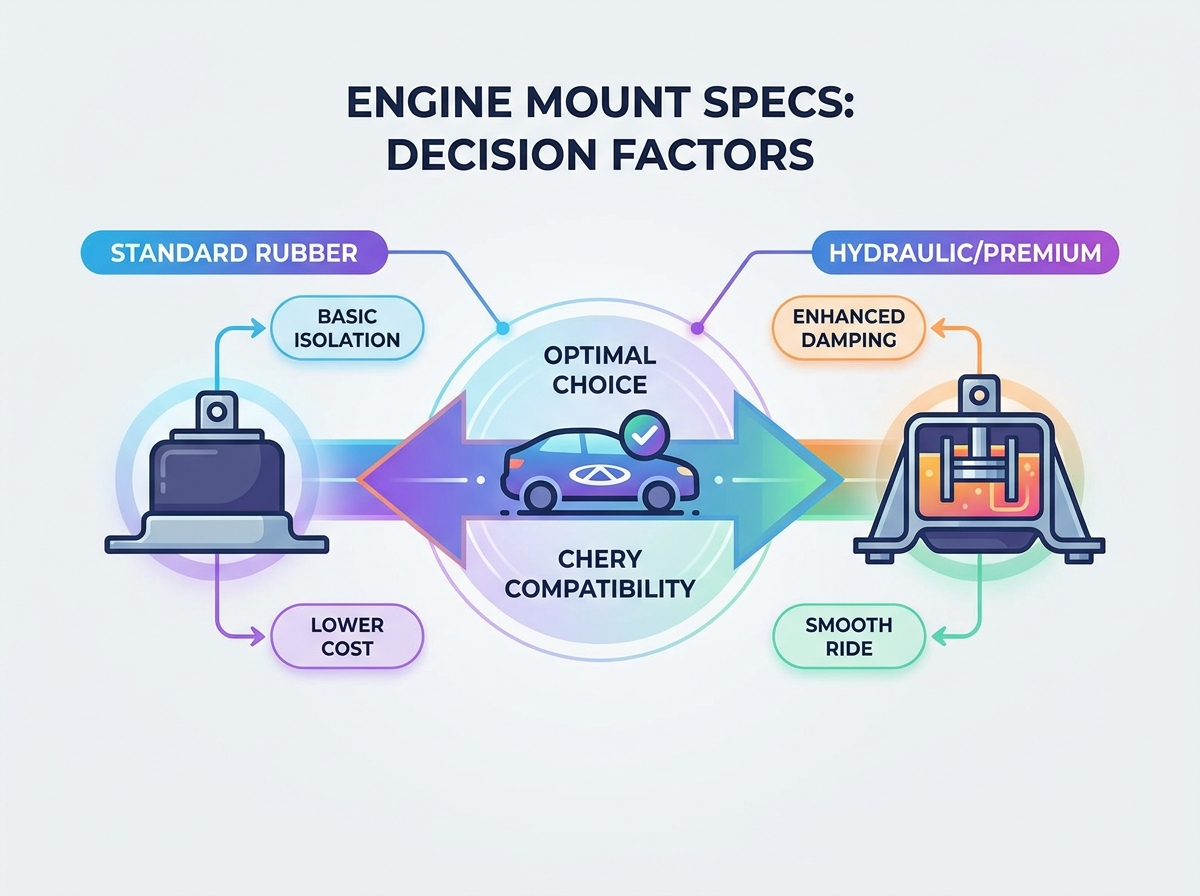
Fluid-filled, or hydraulic, mounts provide active dampening in premium Chery models, whereas traditional solid rubber mounts rely purely on material flex. Hydraulic mounts contain internal chambers filled with glycol or specialized dampening fluids. As the engine moves, the fluid transfers between these chambers through small valves, actively absorbing kinetic energy and neutralizing specific engine frequencies.
Trade-offs exist between these two distinct designs. Hydraulic mounts offer superior dampening, making the cabin exceptionally quiet at idle, but they are prone to fluid leaks over time as the internal bladders wear out. Once the fluid escapes, the mount collapses entirely. Solid mounts are mechanically simpler, more durable, and less likely to fail suddenly, but they transmit slightly more NVH. You must match the replacement type to your specific vehicle trim to maintain factory ride characteristics.
Verifying part numbers against Chery’s OEM catalog is the first step in sourcing a replacement, especially for high-demand models like the Chery Tiggo 4, 7, and Omoda 5. Cross-referencing ensures the replacement part matches the original factory specifications exactly. Even slight variations in bracket angle or bushing width can prevent proper installation and throw off the entire drivetrain angle.
Exact bolt-hole alignment, bracket thickness, and collar geometry are necessary to avoid installation modifications. If a mount requires drilling, grinding, or forcing bolts to fit, it compromises the structural integrity of the chassis mounting points. Always prioritize mounts that guarantee a direct, drop-in fit for your specific chassis code and engine configuration.
| Specification Check | Why It Matters for Chery Models |
|---|---|
| Bolt Hole Spacing | Ensures the mount aligns with factory subframe threads without cross-threading. |
| Bracket Thickness | Prevents metal fatigue and snapping under high torque loads from the 1.6T engine. |
| Bushing Diameter | Maintains the correct center of gravity for the powertrain, preventing axle bind. |
Engine bay heat cycling impacts rubber degradation significantly. Mounts located close to turbocharger assemblies and exhaust manifolds endure extreme ambient temperatures. Over time, constant heating and cooling cause standard rubber to become brittle, lose its elasticity, and eventually tear under the rotational load of the engine.
High-grade vulcanized rubber resists cracking, oil contamination, and ozone exposure. Leaking engine oil or power steering fluid degrades inferior rubber compounds rapidly, turning them into a soft, gummy mess that offers no structural support. Selecting mounts built with thermally resistant, oil-proof synthetic compounds ensures the bushing remains flexible and intact throughout its intended lifespan, regardless of engine bay conditions.
The mount must handle both the static weight of the engine and dynamic torque loads simultaneously. Static load refers to the physical, resting weight of the engine and transmission pressing down on the mounts. Dynamic load occurs during acceleration, hard braking, and aggressive cornering, which multiplies the force exerted on the brackets and rubber isolators.
A mount with insufficient load-bearing capacity will compress completely under load. This "bottoming out" causes the inner metal core to strike the outer metal housing, transferring violent shocks directly to the chassis. Ensure the replacement mount is rated specifically for the weight and torque output of your exact Chery engine variant, rather than a generic four-cylinder rating.
Using a calibrated torque wrench is an absolute requirement during installation. Guessing the tightness of mounting bolts leads directly to stripped aluminum threads in the engine block or loose hardware that backs out over time. Consult specific Chery torque specification guides to find the exact foot-pound or Newton-meter values for your specific chassis.
Differences exist between mount-to-engine bracket torque and mount-to-chassis frame torque. Furthermore, many modern installations require multi-phase tightening sequences. This often involves an initial seating torque to pull the components together, followed by a specific angle-yield tightening step (e.g., 50 Nm + 90 degrees). Following these phases prevents bolt shearing and ensures maximum clamping force without stretching the fasteners beyond their yield point.
Common installation errors include tightening the mount bolts while the engine is suspended unevenly on a jack. This causes severe pre-load stress on the rubber bushing. If the rubber is twisted or stretched when the center bolt is tightened, it will tear prematurely the moment the vehicle is driven and the engine shifts under load.
The "neutralizing" process mitigates this risk entirely. Leave the center through-bolts hand-tight, lower the engine off the support equipment to let it settle naturally into its resting position, and then apply the final torque specifications. This ensures the rubber bushing sits in a neutral, unstressed state, maximizing its ability to absorb vibrations and extending its service life.
A systematic approach to DIY replacement ensures safety and mechanical success. Always use heavy-duty engine support bars across the strut towers or hydraulic floor jacks with thick wood blocks to protect the fragile aluminum oil pan while lifting the engine. Never place a steel jack saddle directly against bare metal engine components, as this will crack the casting.
Evaluating third-party suppliers requires checking for strict manufacturing certifications like ISO9001 or TS16949. These certifications indicate rigorous quality control processes, material testing, and factory auditing. A certified manufacturer is highly likely to produce reliable, dimensionally accurate components that match or exceed factory specifications.
Navigate specialized automotive parts distributors and verified global aftermarket brands carefully. Look for suppliers that provide clear warranty terms, detailed product specifications, and exact cross-reference data for Chery OEM part numbers. Avoid unbranded parts shipped in blank boxes with no verifiable manufacturing history, as these are often made from inferior materials that fail rapidly.
Saving money on an unbranded, sub-standard mount often results in repeated labor costs and immense frustration. Cheap mounts frequently fail within 10,000 to 20,000 miles due to poor rubber curing processes and weak metal stamping. The initial savings are quickly erased by the need to replace the part again, along with potential damage to other drivetrain components caused by the engine shifting out of place.
Investing in premium aftermarket or genuine OEM parts provides superior long-term value and peace of mind. A quality mount lasts longer, maintains proper drivetrain alignment, and keeps the cabin quiet for years. Prioritize durability, proven performance, and exact fitment over the lowest upfront price when sourcing critical suspension and drivetrain components.
The optimal engine mount for Chery vehicles prioritizes exact OEM dimensional fitment and utilizes high-quality rubber-metal construction. Managing NVH effectively requires components built to withstand the specific thermal and dynamic loads of turbocharged engines. Proper installation, including strict adherence to torque specifications and neutralizing the bushings, guarantees the mount performs as intended.
A: Engine mounts on a Chery Tiggo generally last between 60,000 and 100,000 miles, or roughly 5 to 7 years. Lifespan varies based on driving conditions, climate, and transmission type. Frequent hard acceleration, rough roads, and extreme engine bay heat accelerate rubber degradation and fluid leaks in hydraulic variants.
A: Primary symptoms include noticeable clunking noises during gear shifts, excessive engine movement under heavy acceleration, and increased cabin vibration at idle. You may also feel a distinct jolt through the steering wheel or floorboards when turning the engine on or off.
A: Premium aftermarket mounts can match or occasionally exceed OEM quality, provided they meet strict manufacturing certifications like TS16949. However, cheap, unbranded aftermarket mounts generally suffer from poor fitment, inferior rubber compounds, and premature failure under load.
A: You should consult the official Chery service manual for your specific model year and engine type. Verified technical specification databases and professional repair software also provide accurate multi-phase torque details required for safe and proper installation.
A: Chery utilizes both types depending on the model and trim level. Premium models and those with larger turbocharged engines often use hydraulic fluid-filled mounts for enhanced vibration dampening, while standard trims typically use durable solid rubber-metal designs for longevity.


