


Views: 0 Author: Site Editor Publish Time: 2026-07-30 Origin: Site


Unexplained noise, vibration, and harshness in your cabin point directly to a mechanical fault. You will notice this most during idle, transitioning from a dead stop, or during hard acceleration. Isolating an engine mount failure from transmission, suspension, or internal engine issues takes specific diagnostic steps. Many drivers misdiagnose these symptoms, replacing suspension components while the actual problem remains untouched. Ignoring a compromised mount risks severe cascading mechanical failures. You face exhaust manifold cracking, CV joint stress, and radiator hose strain as the engine shifts out of its engineered position. This article provides a definitive diagnostic framework for identifying failing mounts. We evaluate replacement options to restore factory-level drivetrain stability, ensuring your vehicle operates safely and smoothly without transferring destructive kinetic energy into the chassis.
A fully functional engine mount achieves two primary objectives in a Chery vehicle. First, it physically secures the engine block and transmission to the vehicle subframe. Second, it acts as a critical dampening interface. The internal combustion process generates severe kinetic energy, rotational force, and high-frequency vibrations. Without proper isolation, this energy transfers directly into the chassis, making the vehicle undrivable.
Engine harmonics must be dampened before they reach the vehicle cabin. Mounts absorb the high-frequency vibrations generated by piston movement, crankshaft rotation, and valvetrain operation. The physics of this isolation rely on the specific durometer, or hardness, of the rubber isolator. When the rubber is in good condition, it flexes just enough to absorb kinetic energy without allowing excessive engine travel. This keeps the steering wheel, floorboards, and seats smooth during operation. Engineers tune the rubber compound to target specific frequency bands generated by the engine at different RPM ranges.
Mounts maintain the critical geometric alignment between the engine, transmission, and drive axles. Under varying torque loads, the powertrain naturally wants to twist in the opposite direction of the crankshaft rotation. The mounts resist this rotational force. Keeping the engine perfectly aligned ensures that CV axles operate at their intended angles. If the engine drops or twists, the CV joint angles become severe, causing rapid wear and binding. Proper alignment also prevents binding in the shift linkages and reduces stress on the exhaust flex pipe, which can tear if stretched beyond its design limits.
Chery engineering utilizes different types of mounts depending on the vehicle platform, engine size, and NVH targets. Passive solid rubber mounts are common in compact models. They use a solid block of engineered rubber bonded to steel brackets. These are highly durable but offer basic vibration isolation. Premium models often feature fluid-filled hydraulic mounts. These contain upper and lower chambers filled with glycol or hydraulic fluid, separated by a valving track. As the engine vibrates, the fluid transfers between chambers to actively absorb specific vibration frequencies, offering superior NVH control. Some advanced platforms even use active electronic mounts that change stiffness based on engine RPM.
Continuous engine bay heat cycles accelerate the breakdown of rubber components. The rubber expands when hot and contracts when cold, eventually losing its elasticity. Road grime, salt, and accidental oil leaks further degrade the material. Petroleum-based fluids like motor oil or power steering fluid act as solvents, turning solid rubber into a soft, spongy mess. Over time, the rubber becomes brittle and begins to tear under torque. This degradation typically reaches a critical point near the 100,000-mile or 10-year threshold. Once the rubber hardens or cracks, it can no longer absorb vibrations effectively, and the metal brackets may eventually make contact.
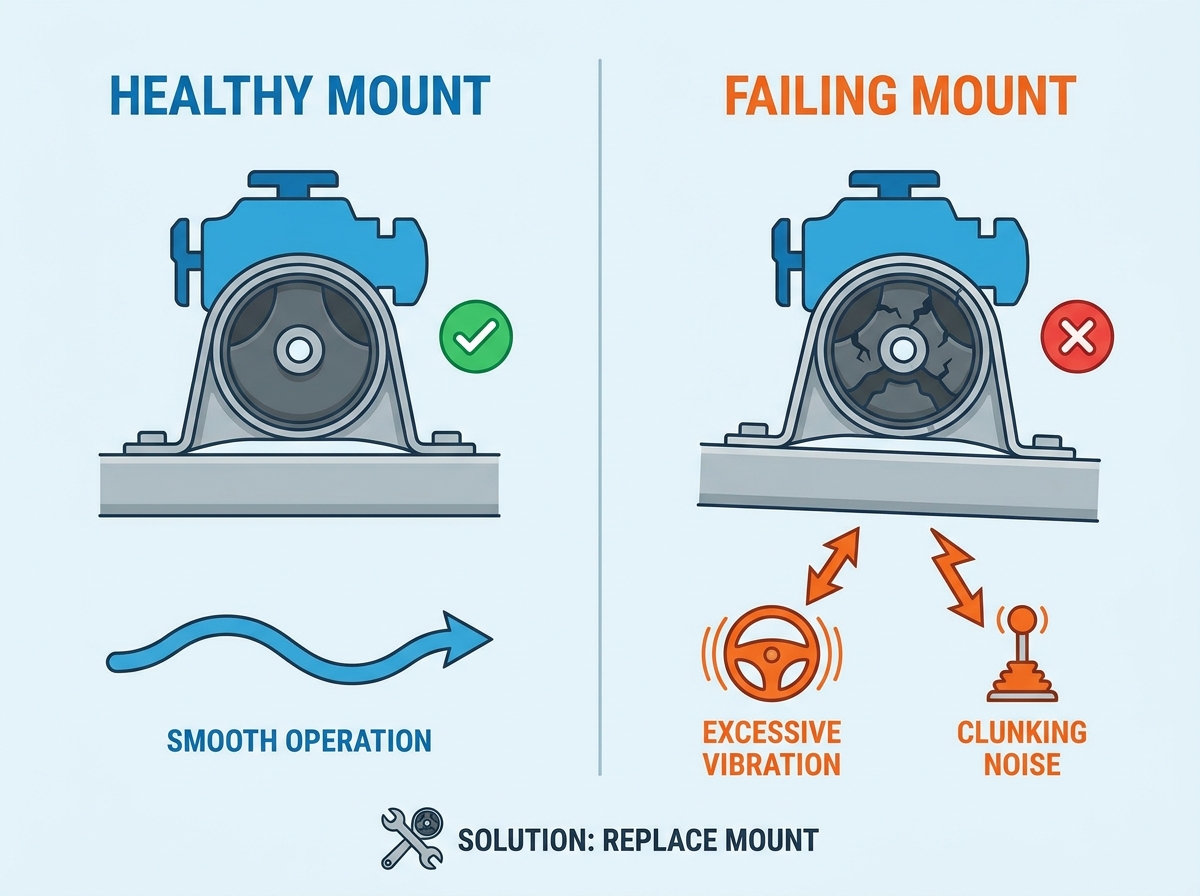
Identifying a failing mount requires paying attention to specific tactile and auditory cues. The symptoms often present themselves during specific driving conditions, particularly when the drivetrain is under heavy load or transitioning between forward and reverse gears.
The most common early warning sign is tactile feedback felt through the steering wheel and floorboards. You will notice this most when stopped in gear, such as at a red light. The engine is running, the transmission is engaged, but the vehicle is stationary. Compromised dampening material allows engine vibrations to pass directly into the cabin. Shifting into neutral removes the load from the drivetrain, which often reduces the vibration. This change in vibration between Drive and Neutral strongly confirms the mounts are struggling under load.
Listen for a distinct "thud" during sudden acceleration. Launching from a stoplight puts immense rotational torque on the engine. If a mount is torn, the engine block physically lifts and impacts the chassis or the metal mount bracket. You might also hear these clunks during sudden deceleration, harsh shifting, or when shifting from Reverse to Drive. This metal-on-metal contact indicates excessive play in the drivetrain and means the rubber isolator has completely failed.
Physical engine lurching within the engine bay is a severe symptom. When you accelerate, the engine can twist several inches if the mounts are broken. This displacement can be severe enough to cause secondary contact. The engine might hit the radiator fan, strain wiring harnesses, or pull on coolant hoses. You can often feel this lurching as a hesitation or jerkiness when applying the throttle, as the engine moves before the power transfers to the wheels.
A physical inspection often reveals the root cause. Look for dry rot, deep cracking, or complete tearing of the rubber isolator. The rubber should look solid and intact. Use a flashlight to inspect the mounts from multiple angles. If you have hydraulic mounts, look for black or brownish fluid leaking down the side of the mount bracket. A fluid leak means the internal bladder has ruptured, and the mount has failed completely, even if it looks structurally intact.
Secondary visual cues can also indicate mount failure. Look for a visibly sagging engine block. The engine might sit lower on one side, making the valve cover look tilted. Check for misaligned cooling hoses that look stretched or pinched. Inspect the exhaust flex pipe for abnormal tension, fraying, or soot marks indicating a leak. These signs mean the engine is no longer sitting in its factory position, putting immense strain on every connected component.
Accurate diagnosis prevents wasting money on unneeded parts. You must isolate the mount as the source of the NVH. A systematic approach rules out suspension and engine performance issues.
This test requires two people. Pop the hood and stand safely to the side of the vehicle, never directly in front of it. Have an assistant start the engine and ensure the transmission is in Park or Neutral. Instruct them to quickly rev the engine to about 2,500 RPM and let off the throttle. Observe the engine block. A healthy engine will torque slightly but remain firmly in place. Excessive lateral or longitudinal engine displacement indicates a torn mount. Watch for the engine lifting on one side and slamming back down.
This is the industry-standard method for observing engine lift under load. Apply the parking brake fully. Have your assistant press the brake pedal firmly with their left foot. Instruct them to shift into Drive. While holding the brake securely, they should lightly apply the throttle with their right foot for one or two seconds. Observe the engine. Repeat the process in Reverse. If the engine lifts significantly off its mounting point, the mount is broken. The front mount usually shows wear in Drive, while the rear mount shows wear in Reverse.
You can physically manipulate the mount to check for hidden tears. Safely support the vehicle on heavy-duty jack stands. Never rely on a hydraulic jack alone. Use a large pry bar to apply leverage between the engine block and the mount bracket. Gently pry upward or side-to-side. Look for separation between the rubber and the metal bracket. If the rubber stretches excessively, reveals a deep tear, or if the metal bracket moves independently of the rubber, replacement is necessary.
You must rule out adjacent issues that mimic mount failure. Worn transmission mounts, failing CV axles, and suspension bushings can cause similar clunks. Engine misfires cause abnormal vibration that feels like a bad mount, but misfires usually trigger a check engine light. Use the table below to differentiate the symptoms.
| Diagnostic Symptom | Engine Mount Failure | Engine Misfire | Suspension/Axle Issue |
|---|---|---|---|
| Vibration at Idle | Severe, lessens in Neutral | Accompanied by fluctuating RPM | None |
| Clunking Noise | During hard acceleration/shifting | None | Over bumps or while turning |
| Check Engine Light | Off | Usually flashing or solid | Off |
| Vibration at Highway Speed | Minimal to moderate | Moderate to severe | Severe, often steering wheel shake |
| Visual Inspection | Torn rubber, leaking fluid | Worn spark plugs, bad coils | Torn CV boots, loose ball joints |
Selecting the right replacement part determines how your vehicle will feel and perform. You have several procurement routes to consider, each with specific trade-offs regarding cost, longevity, and vibration control.
OEM parts offer guaranteed fitment and the exact factory-spec durometer. They carry a higher upfront cost but deliver predictable results. OEM is highly recommended for Chery models utilizing hydraulic mounts to preserve NVH metrics. Aftermarket alternatives offer variable quality. You must vet manufacturers for ISO/TS 16949 compliance. This ensures the rubber will not suffer from premature hardening or failure. Cheap aftermarket mounts often use solid rubber instead of fluid-filled chambers, which drastically increases cabin vibration.
Evaluate the trade-offs between standard rubber and polyurethane. Standard rubber is cost-effective and provides the factory feel. It absorbs vibrations perfectly for daily driving. Polyurethane offers higher durability and resists oil contamination. It will outlast rubber significantly. However, polyurethane is much stiffer and transfers significantly more NVH to the cabin. For daily driving, standard rubber is usually preferred. When sourcing an Engine mount for Chery, verify the material matches your comfort requirements and driving style.
Check the availability of specific mount configurations. Vehicles typically have a front, rear, left, and right mount. Transverse engine layouts often use a dog-bone style torque strut mount on top and heavier load-bearing mounts on the bottom. Older Chery models might have limited aftermarket support, requiring OEM sourcing. If your vehicle has high mileage, replacing mounts in sets is highly recommended. A new, stiff mount will transfer extra stress to the remaining old mounts, causing them to fail shortly after. Replacing them all at once restores the factory drivetrain geometry completely.
Replacing an engine mount involves significant mechanical intervention. Understanding the risks ensures a successful repair and prevents damage to the vehicle or injury to the technician.
Ignoring a bad mount leads to expensive secondary repairs. The excessive engine movement shears exhaust manifold bolts, leading to exhaust leaks and poor engine performance. It accelerates transmission mount wear, as the transmission takes on the load the engine mount should be holding. The altered drivetrain geometry causes premature CV joint failure due to extreme operating angles. The constant flexing can also crack the radiator end tanks if the hoses pull too tight. Replacing a mount early saves money by protecting these adjacent components.
Assess the technical requirements before attempting a DIY replacement. You need proper engine support equipment. An under-hoist support bar spanning the fenders or a floor jack with a wide wood block is mandatory to support the oil pan safely. Never jack directly against the bare aluminum oil pan, as it will crack. Access constraints often require removing intake manifolds, battery trays, or inner fender liners. Specialized tooling, like long extensions, swivel sockets, and a 1/2-inch drive torque wrench, is usually necessary. Improper engine lifting poses severe safety risks and can crush components against the firewall.
Proper installation requires neutralizing the mounts. Do not tighten the bolts completely right away. Leave the mounting bolts hand-tight. Start the engine and let it run for a few seconds. Shift through the gears while holding the brake. This allows the engine to settle into its natural resting position within the new mounts. Turn off the engine and torque all bolts to factory specifications using a calibrated torque wrench. This prevents pre-loading the rubber. Pre-loading twists the rubber at rest, which causes premature tearing and failure of the new part within a few thousand miles.
Diagnosing and replacing a failing engine mount is a critical maintenance intervention. It directly impacts vehicle safety, passenger comfort, and the longevity of adjacent drivetrain components. Do not ignore persistent cabin vibrations or clunking noises during acceleration. Prioritize OEM or high-tier aftermarket hydraulic mounts for daily drivers to maintain factory NVH standards.
A: Standard engine mounts typically last between 80,000 to 120,000 miles. Environmental factors, heat cycles, and driving habits affect this lifespan. Rubber naturally degrades over time, so mounts often require replacement within 10 years of service, regardless of mileage.
A: Driving with a broken mount is not recommended. It allows excessive engine movement, which can damage the exhaust system, transmission linkages, and CV axles. In severe cases, the engine can shift enough to cause a loss of vehicle control or severe mechanical failure.
A: Engine mount vibrations are usually constant at idle and lessen when shifting into neutral. Misfires cause a stumbling or fluctuating RPM, often accompanied by a flashing Check Engine Light. A scan tool can quickly rule out an engine misfire.
A: Yes, replacing them in sets is highly recommended. If one mount fails, the others have likely absorbed extra stress and are near the end of their lifespan. Installing one stiff new mount can cause the remaining old mounts to fail rapidly.
A: Solid rubber mounts use a block of engineered rubber to absorb vibrations. Hydraulic mounts contain fluid-filled chambers that actively dampen specific frequencies. Hydraulic mounts offer superior vibration isolation but are more expensive and can leak when they fail.
A: This clunk occurs because the engine block is physically lifting and hitting the chassis or mount bracket. The torn rubber isolator can no longer hold the engine in place against the rotational torque generated during acceleration or gear engagement.


