


Views: 0 Author: Site Editor Publish Time: 2026-07-28 Origin: Site


Excessive cabin vibration at idle, a distinct clunking noise during hard acceleration, and visible engine sag are immediate physical symptoms of a failing engine mount. When these signs appear, ignoring them is not an option. Selecting an incompatible or low-quality replacement part introduces severe risks to your vehicle. Installing the wrong Engine mount for Chery models often leads to unresolved NVH (Noise, Vibration, Harshness), premature failure of associated drivetrain components, and wasted labor hours.
This guide provides a technical framework for evaluating mount materials and comparing OEM versus aftermarket options. You will learn exactly how to ensure precise fitment for specific Chery models. We will walk through the exact diagnostic steps, material differences, and installation realities you face in the garage. By following these guidelines, you can restore factory comfort, protect your drivetrain from excessive shock loads, and avoid doing the same repair job twice.
A properly functioning engine mount serves two distinct mechanical purposes. First, it isolates engine harmonics from the vehicle chassis. This prevents high-frequency vibrations from traveling through the subframe and reaching the passenger cabin. Second, it maintains precise drivetrain alignment under heavy torque loads. When you press the accelerator, the engine naturally attempts to twist backward due to rotational force. The mount restricts this movement. It ensures that power transfers efficiently through the transmission to the drive wheels without putting angular stress on the CV axles or stretching the exhaust flex pipes beyond their design limits.
Factory mounts achieve this balance using specific rubber durometers and internal fluid chambers. When the vehicle rolls off the assembly line, the engine sits perfectly level. The gap between the oil pan and the subframe remains consistent. The shifter mechanism aligns perfectly with the transmission linkages. Establishing this baseline helps you understand exactly what you lose when a mount begins to degrade.
Physical indicators dictate exactly when a replacement becomes necessary. You cannot rely on mileage alone. Visual inspection often reveals torn rubber isolators. These tears allow excessive engine movement, which you feel as a hard thump when shifting from reverse to drive. For fluid-filled units, leaking hydraulic fluid is a definitive sign of failure. You will often see a dark, sticky residue coating the subframe directly below the mount.
In severe cases, the rubber degrades completely, resulting in metal-to-metal contact points. This condition transmits harsh vibrations directly into the steering wheel and floorboards. It makes the vehicle uncomfortable and potentially unsafe to drive. You might also notice the engine sitting visibly lower on one side. This sag alters the geometry of the serpentine belt system and can cause pulleys to rub against chassis components.
To properly diagnose a failing mount in your garage, follow these specific inspection steps:
Frame your purchasing decision around specific, measurable outcomes. A successful replacement must restore factory NVH levels, making the cabin completely quiet at idle. You should not feel the engine running through the steering wheel. The replacement part must guarantee a minimum operational lifespan, typically exceeding 60,000 miles under normal driving conditions.
Furthermore, the chosen part must allow for seamless installation. You should not have to modify the subframe, drill new holes, or grind down mounting brackets to make the part fit. The bolt holes must align perfectly with the factory chassis threads. Achieving these criteria requires selecting the correct material and verifying exact fitment before you ever put a wrench on the vehicle.
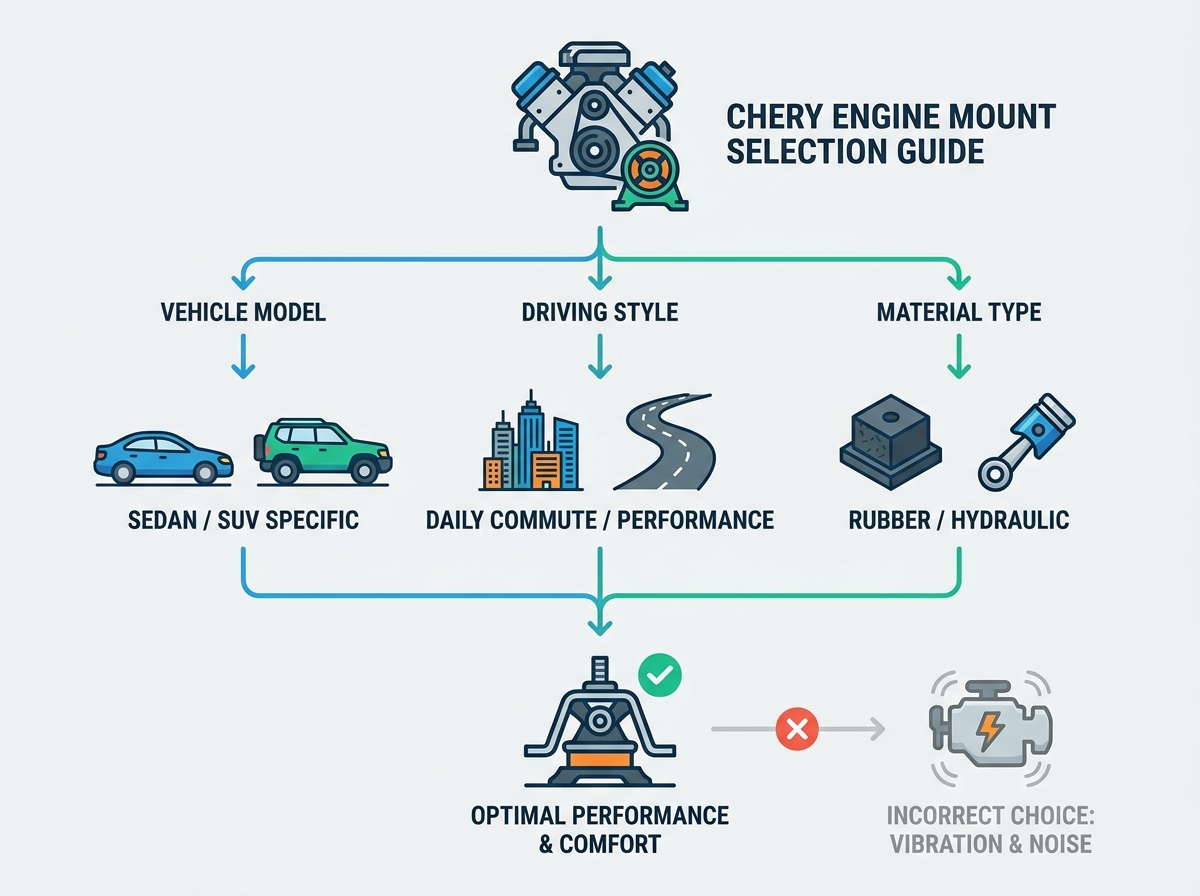
Vulcanized rubber absorbs high-frequency vibrations effectively. These mounts feature solid rubber blocks engineered with specific voids to allow controlled flex. Manufacturers tune the rubber compound to a specific durometer to match the weight and vibration characteristics of the engine. They strike an excellent balance between comfort and durability. The rubber flexes just enough to absorb the harshness of a four-cylinder engine at idle.
However, rubber remains vulnerable to environmental degradation. Engine bay heat bakes the material over time, causing it to harden and crack. Oil leaks from valve cover gaskets act as a solvent, rapidly breaking down the rubber structure. Standard rubber mounts are best suited for daily-driven Chery models, such as the Arrizo sedans. In these applications, restoring factory comfort remains the primary objective, and the engines do not generate enough torque to require stiffer materials.
Hydraulic mounts utilize internal fluid chambers to dynamically dampen vibrations across varying engine RPMs. As the engine vibrates, a glycol-based fluid forces its way through internal valving. This action absorbs energy much like a miniature shock absorber. They offer superior NVH reduction compared to solid rubber. Engineers use them extensively to mask the inherent imbalance of inline-four engines.
The trade-off involves a higher initial purchase price and the risk of catastrophic failure. If the outer rubber seal tears, the fluid leaks out. This leads to an immediate loss of dampening. The mount collapses, and you instantly feel a massive increase in cabin vibration. Owners often ask about converting from expensive hydraulic mounts to cheaper solid rubber alternatives. This downgrade dilemma requires careful thought.
While a rubber conversion saves money upfront, the long-term impact on cabin comfort is highly noticeable. The increased vibration at idle often frustrates drivers who expect a smooth ride. Hydraulic mounts remain best for premium Chery SUVs, like the upper-trim Tiggo series. These vehicles often feature larger displacement or turbocharged engines that generate complex harmonics requiring advanced isolation.
High-durometer plastics or solid metal construction completely eliminate engine deflection. These materials lock the drivetrain in place. The engine cannot twist under acceleration. This provides a significant increase in durability and immediate throttle response. Power transfers instantly to the wheels without being absorbed by flexing rubber. This appeals heavily to driving enthusiasts and track day participants.
However, this performance comes at a steep cost. Cabin vibration and harshness increase drastically. You will feel every pulse of the engine through the seats. Interior trim panels may begin to rattle. Solid mounts are generally discouraged for standard passenger use. They belong on highly modified vehicles or specific heavy-duty applications where driver comfort is secondary to mechanical rigidity.
| Driving Profile | Ideal Mount Material | Primary Benefit | Trade-Off |
|---|---|---|---|
| Urban Commuting (Arrizo Sedans) | Standard Rubber | Smooth idle, affordable replacement | Vulnerable to oil leaks and heat cycling |
| Premium / Highway Cruising (Tiggo SUVs) | Hydraulic (Fluid-Filled) | Maximum vibration isolation across RPM range | Prone to sudden fluid leaks and collapse |
| Track / Heavy Modification | Polyurethane / Solid | Zero engine deflection, instant throttle response | Extreme cabin vibration, interior rattling |
Genuine OEM mounts guarantee predictability in the repair bay. They feature the exact factory durometer and precise dimensional tolerances required for your specific chassis. When you buy OEM, the bolt holes line up perfectly. You do not have to fight the subframe with a pry bar to get the threads to catch. Choosing OEM means you benefit from historical reliability and extensive factory testing.
The factory-spec hydraulic seals are engineered to withstand the specific heat cycles of Chery engine bays. The rubber compounds resist ozone degradation better than cheap alternatives. Furthermore, OEM warranties provide a safety net. If a mount fails prematurely due to a manufacturing defect, the dealership network covers the replacement. For complex hydraulic mounts, the OEM route often saves you from doing the job twice.
If budget constraints push you toward the aftermarket, rigorous vetting is absolutely essential. The aftermarket is flooded with subpar rubber components. Look for quality indicators such as ISO/TS 16949 certifications. This proves the manufacturer adheres to strict automotive quality standards. Review the warranty terms carefully and demand transparent material specifications from the supplier.
Beware of the cheap part trap. Unbranded, low-cost aftermarket mounts often utilize inferior rubber compounds mixed with excessive fillers. These budget options frequently fail to dampen vibrations right out of the box. They might look identical to the factory part, but the rubber is either too hard, causing harshness, or too soft, allowing the engine to bounce. In many cases, these cheap mounts tear completely within the first 10,000 miles, putting you right back where you started.
Cross-referencing your vehicle identification number (VIN) with a digital parts catalog is the only foolproof method to secure the correct component. Guessing based on the year and model leads to installation failures. Chery frequently updates part designs mid-production year. A 2019 Tiggo might use a completely different mount bracket than a 2020 model built just a few months later.
Third-party auto parts databases often contain catalog errors regarding Chery import models. They might list a mount as compatible across all trim levels when, in reality, the turbocharged engine requires a specific hydraulic unit. Always verify the exact OEM part number before completing a purchase. This ensures the mounting holes, bracket angles, and overall height align perfectly with your specific drivetrain configuration.
Mount designs differ significantly across the Chery lineup. The heavy-duty mounts found in the Tiggo SUV series feature different load ratings than those in the Arrizo sedan series. The Tiggo mounts must support a heavier engine and handle the increased torque of an all-wheel-drive system. Legacy models like the Chery QQ use much simpler, smaller rubber isolators.
Transmission dependencies also play a major role in mount selection. Mounts designed for manual, CVT, and dual-clutch (DCT) transmissions vary structurally within the exact same vehicle model. A CVT transmission casing has different mounting bosses than a manual transmission. The torque delivery characteristics also differ. A DCT produces sharper shifting shocks, requiring a mount tuned to absorb those specific impact loads.
Lowered or heavily modified Chery vehicles introduce unique fitment challenges. Altering the suspension geometry changes the angle of the CV axles. Standard mount heights might create axle bind or cause the exhaust downpipe to interfere with the steering rack. In these cases, builders often look for adjustable mounts or fabricate custom brackets to correct the drivetrain angle.
For custom track builds, mechanics sometimes debate fully welded mounts off the subframe versus standard bolt-on applications. Welded mounts offer extreme rigidity but permanently alter the chassis. They transmit massive amounts of stress directly into the subframe metal, which can lead to stress fractures over time. Always consult local automotive certifiers to ensure highly modified or custom welded mounts comply with public road safety laws in your region.
Accessing engine mounts involves physical realities that complicate the job. You rarely have a clear path to the bolts. You often need to remove intake components, splash shields, or reroute exhaust sections just to reach the mounting hardware. The passenger side mount usually requires removing the coolant reservoir and moving the power steering lines out of the way. The rear torque strut mount often demands long extensions and swivel sockets to access bolts hidden above the subframe.
Before lifting the engine block, you must perform critical clearance checks. Verify engine clearance against the firewall, wiring harnesses, and AC lines. Lifting the engine too high can crush delicate sensors against the cowl or stretch wiring harnesses until the pins pull out of their connectors. Properly supporting the engine is a non-negotiable safety requirement. Never place a jack directly against the thin aluminum oil pan without a wide wood block to distribute the load. Alternatively, deploy a dedicated engine support bar across the strut towers to hold the engine securely from above prior to unbolting the mount.
Follow these best practices during the removal and installation phase:
Tightening mount bolts to exact Chery factory torque specifications prevents thread stripping and stops the mount from binding unnaturally. Never use an impact wrench for final tightening. An impact wrench can easily rip the threads out of the aluminum engine block brackets. Use a calibrated torque wrench and follow the factory service manual for the exact foot-pounds required for each specific bolt.
A critical best practice involves the final alignment check. Leave the through-bolts hand-tight initially. Start the engine briefly and let it idle for ten seconds. Shift the transmission from Park to Reverse, then to Drive, and back to Park. This allows the drivetrain to settle into its natural, stress-free position within the new rubber isolators. Turn the engine off, and then apply final torque to all fasteners. This alignment procedure prevents the new rubber from being pre-loaded with twisting stress, which would cause premature tearing.
Choosing the correct replacement mount for your Chery vehicle demands attention to detail. You must match the material specifications to your personal NVH tolerance and operational budget. A systematic approach prevents wasted money and recurring vibrations. By understanding the differences between rubber and hydraulic units, and by respecting the installation procedures, you ensure a successful repair.
A: Engine mounts on Chery vehicles typically last between 60,000 and 100,000 miles. Driving aggressively, frequent towing, or operating in extreme temperatures shortens this lifespan. Additionally, engine oil leaks dripping onto rubber mounts will rapidly degrade the material, causing premature failure.
A: It is highly recommended to replace engine mounts in pairs or complete sets. Replacing only one mount forces the new, stiff component to absorb the excess movement allowed by the remaining worn mounts. This uneven stress causes the new mount to fail much faster.
A: Perform a visual inspection of the mount. Hydraulic mounts often have a metal casing and will show dark, oily fluid stains if they have failed. To be absolutely certain, cross-reference your VIN with the OEM service manual or a certified parts catalog.
A: Driving with a broken engine mount is unsafe. It allows excessive engine movement, which can damage the radiator, snap wiring harnesses, or tear exhaust flex pipes. In severe cases, it can cause the accelerator linkage to bind, leading to a loss of vehicle control.
A: Yes, many aftermarket rubber and polyurethane mounts require a break-in period. You may notice slightly higher cabin vibrations immediately after installation. The material typically softens and settles into its natural position after 500 to 1,000 miles of driving, reducing harshness.
A: You need a reliable floor jack, a block of wood to protect the oil pan, jack stands, a metric socket set (typically 15mm to 18mm), long extensions, a breaker bar, and a calibrated torque wrench for final tightening.


