


Views: 0 Author: Site Editor Publish Time: 2026-10-29 Origin: Site


Replacing a failing brake line goes beyond basic maintenance chores. It stands as a critical safety intervention for every rider. When you pull the lever, you expect immediate, reliable stopping power. Your life depends on this mechanical response. Finding exact-fit parts for specific Lifan models often requires careful navigation. You must choose between standard OEM components and aftermarket alternatives. Models like the Lifan 150, KP series, or X-Pect possess unique dimensions. Using incorrect parts compromises your safety and ride quality. A slight mismatch in wire travel causes massive braking inefficiencies. This guide provides a technical evaluation framework. It helps you select a reliable Brake Cable for Lifan motorcycles. We outline specific measurements, material upgrades, and construction standards. Following this framework ensures you choose a high-performance component. You will achieve proper fitment, dependable stopping power, and long-term durability across all your rides.
Mechanical degradation happens gradually over hundreds of miles. You might not notice the subtle drop in stopping performance immediately. Identifying the physical indicators of cable wear prevents dangerous failures on the road. Visual wear serves as your first diagnostic tool. Fraying near the lever or drum ends stands as the most obvious warning sign. Individual steel strands snap one by one under repeated tension. You should also look closely at the outer rubber housing. Sun exposure and temperature fluctuations cause the rubber to crack. Cracked housings invite moisture directly inside the protective conduit. Visible rust on the inner wire means structural compromise has already begun. Rust creates abrasive friction against the inner walls.
Environmental exposure accelerates this decay. Commuting in heavy rain washes away factory lubrication. Riding on salted roads causes aggressive oxidation on exposed metal parts. Leaving your motorcycle parked outdoors exposes the rubber casing to harsh ultraviolet rays. This environmental bombardment degrades OEM materials quickly. Riders must remain vigilant.
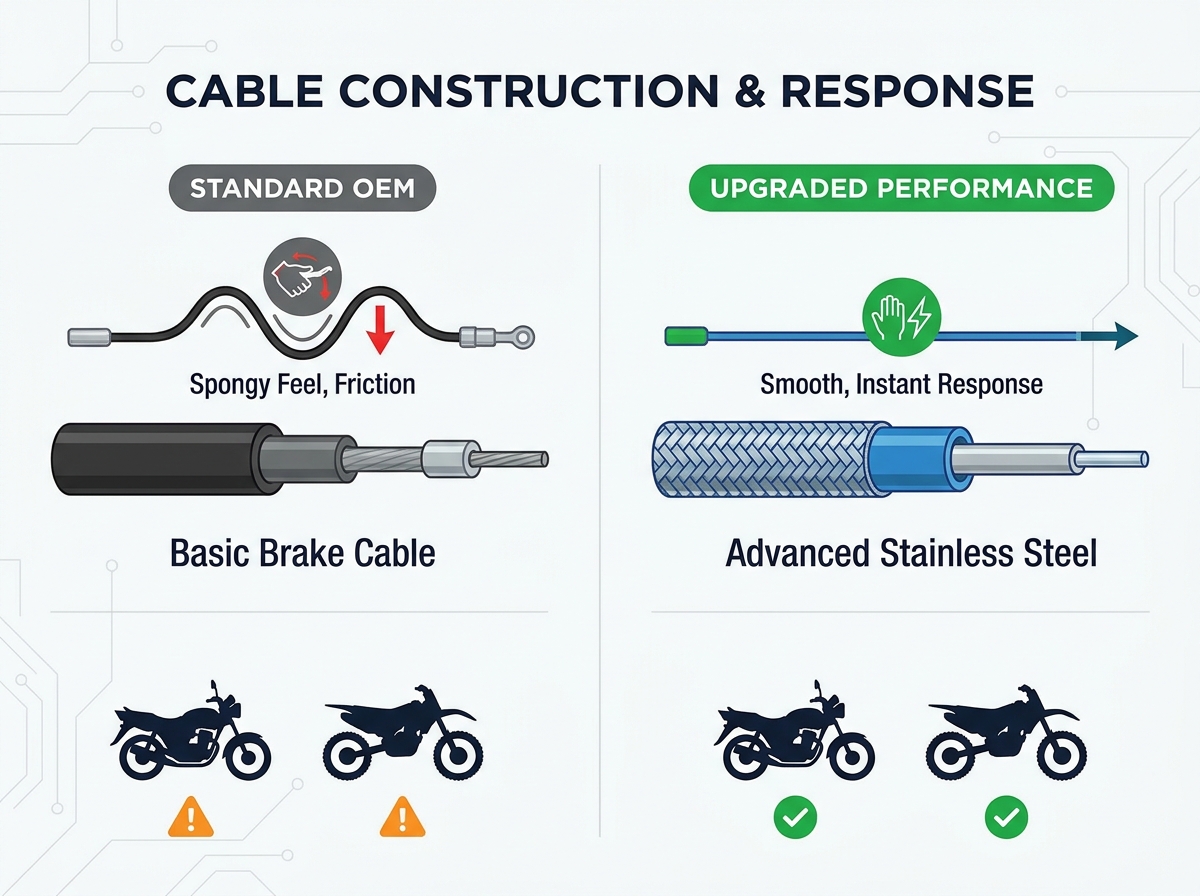
Tactile feedback tells a crucial story about mechanical health. Your hands can detect minor irregularities during operation. A "spongy" brake lever indicates stretching or inner housing compression. You might feel excessive friction or a gritty sensation during the lever pull. If the lever fails to snap back immediately upon release, internal binding is occurring. Dirt accumulation, frayed strands, or lack of internal lubrication cause this dangerous hesitation.
Your primary goal during replacement involves restoring optimal functionality. You want to achieve linear, predictable braking force. We aim to eliminate any mid-travel resistance completely. We recommend testing lever feel before every long ride. The lever should feel crisp and highly responsive. The braking action must translate your physical input directly to the brake drum without delay.
Motorcycle geometries differ wildly across various design categories. A brake cable built for a Lifan 150 commuter will differ drastically from one designed for a Lifan dirt bike or cruiser. Commuter models feature upright handlebars and shorter wheelbases. Dirt bikes demand longer lines to accommodate extensive suspension travel and wider handlebar sweeps. Adding aftermarket handlebar risers also changes your length requirements entirely. Installing taller handlebars necessitates a much longer conduit. Using the stock length on modified bars stretches the inner wire dangerously tight. This tension applies constant pressure to the brake shoes. You will burn out your brake pads prematurely.
You must evaluate three key measurement dimensions strictly. First, measure the outer housing conduit length. The housing must reach from the lever assembly down to the brake hub. It requires enough slack to permit full handlebar rotation from lock to lock. A short housing restricts steering and pulls the brake unintentionally. Second, measure the inner wire length and travel. This dimension defines the exact distance the wire protrudes from the housing. Incorrect travel results in brakes dragging constantly or failing to engage entirely. Third, inspect the end fittings or nipples. Manufacturers typically use barrel ends or pear ends. You must compare the physical shape of your current anchor points against the replacement unit.
We strongly warn riders against using "universal" repair kits. These packages require manual cutting and clamping of the wire. Universal cables introduce unnecessary failure points at the anchor screws. They frequently slip under extreme braking pressure. Only trust components manufactured to exact factory specifications.
Brake Cable Measurement Guidelines
| Measurement Dimension | Component Description | Impact of Incorrect Sizing |
|---|---|---|
| Outer Housing Length | Total length of the flexible protective conduit. | Restricted steering lock or cable binding during sharp turns. |
| Inner Wire Travel | Exposed wire moving freely outside the conduit. | Brakes drag continuously or fail to engage the drum fully. |
| Nipple Fitting Style | Shape of the machined metal anchors (barrel or pear). | Lever slipping or complete inability to mount the part safely. |
You can choose from several material constructions when replacing your lines. Each material type offers distinct advantages and drawbacks depending on your riding style. Understanding these differences helps you make an informed upgrade decision.
Riders must evaluate their typical riding conditions objectively. A standard setup works perfectly fine for regular city commuting. Trail riders benefit immensely from frictionless Teflon linings. Purchasing a high-grade Brake Cable for Lifan models ensures you match component quality to your performance expectations.
Separating high-quality parts from cheap, unreliable imports requires an evidence-oriented evaluation. Visual inspection reveals critical manufacturing differences long before installation begins. A premium component displays specific structural hallmarks. You can identify these traits simply by examining the hardware closely.
Low-quality manufacturers often cut corners on internal strand counts. They use fewer, thicker strands to save production costs. This approach creates a rigid, brittle wire. High-quality cables utilize many fine steel strands woven tightly together. This woven structure bends easily around the steering head without snapping. It absorbs hundreds of thousands of lever pulls before showing signs of fatigue.
We recommend checking the following key quality indicators:
Checking these structural elements guarantees you install a reliable product. Inferior aftermarket parts often lack proper weather sealing completely. They use thin wires prone to snapping during emergency stops. Always prioritize mechanical integrity over minor upfront cost savings. A structurally sound component stands as your best defense against unexpected mechanical failures on the road.
Purchasing a premium component only solves half the maintenance equation. Proper installation determines how long the part survives in real-world riding conditions. Routing accuracy dictates the entire system lifespan. The new line must follow the factory routing path exactly as designed. Pinch points or acute angles cause premature wire snapping. Bad routing also triggers uncommanded braking when turning the handlebars sharply. Always map or photograph the original path before removing the old part from the chassis.
Cable ties require careful application. Riders often secure lines to the frame using tight zip ties. Over-tightening crushes the outer housing. Crushing restricts the inner wire movement permanently. Leave a small gap when securing the line. The conduit must slide slightly within the zip tie loop as the suspension compresses and extends.
Pre-installation preparation significantly extends component life. You must apply cable lube for standard non-Teflon cables. Use a specialized cable lubricator tool before threading the line onto the bike. Clamp the tool over the top opening and spray aerosol lubricant inside. This forces the protective fluid down the entire housing length. It flushes out manufacturing dust and coats the inner wire evenly. Teflon-lined alternatives do not require this messy step.
Adjustment and testing form the final critical phase of implementation. You must set the correct free-play at the hand lever. Most service manuals recommend maintaining between 10 to 20 millimeters of free-play. This precise slack prevents the brake shoes from dragging constantly against the drum. Lift the front wheel off the ground using a stand. Spin the tire forcefully by hand. Verify the wheel spins freely when you release the brake. Any dragging sounds indicate a routing issue or improper tension adjustment. Fixing these minor errors immediately prevents dangerous overheating issues during your ride.
Selecting the ideal replacement part requires prioritizing precise measurements and quality fittings over lower prices. Proper component selection directly influences your daily safety and riding confidence. Relying on substandard materials puts you at unnecessary risk during emergency stopping scenarios.
Your next step involves direct mechanical action. Remove your current worn assembly from the motorcycle carefully. Measure the outer housing length and the inner wire travel meticulously. Cross-reference these specific dimensional numbers with verified Lifan part suppliers or reputable aftermarket manufacturers. Inspect the new item for heavy-duty crimps and weather sealing boots before installation. Secure the correct replacement today to restore your motorcycle's ultimate braking authority.
A: It is highly discouraged for safety reasons. Universal cables utilizing screw-on nipples remain prone to slipping under heavy braking force. This sudden slipping results in total brake failure. Always opt for exact-fit, factory-crimped cables designed specifically for your model's geometry.
A: While there is no strict mileage rule, cables should undergo annual inspection. Replace them immediately if you feel increased friction, see rust, or spot frayed wire strands. Environmental factors like heavy rain and mud accelerate wear, requiring more frequent replacements for off-road riders.
A: Generally, no. Standard oil or aerosol lubricants can actually degrade the Teflon liner or attract dirt, causing the cable to stick. Only use dry lubricants specifically approved for Teflon systems if absolutely necessary. A clean, dry installation usually provides the smoothest long-term performance.


